Last year at this time I was in Turkey with two wonderful friends visiting. We scaled down Castle Mountain, ate cake in the rain, and hamam-ed it up. It was a wonderful end to 2011.
I spent the last days of the year contemplating a crafting goal, and a blog that would accompany it. Thus "Crafts From My Couch" was born. I am super proud to say that I was successful in my goal of completing a new craft, and blogging about it, every week. I'm less proud to say that this is the first New Year's Resolution I've ever kept. But here's to turning over new leaves.
During the year, I improved upon skills I already had (embroidery, crochet, sewing), and embarked upon new crafting adventures (upholstery, painting, wood working). I proved that I could finish something I started, and the piles of "some days" disappeared. I learned that crafting something didn't always involve buying new supplies, and that when it did, I should only buy for right now. Also, crafting stopped being a chore, and started being a routine, a constant companion to movies, TV, and everyday life.
I'm still not the crafter (or blogger) that I hope to be some day, but I'm closer than I ever have been.
I figured as a way to celebrate the ending of the year, I would do a Top 12 List. So below are my favorite projects of 2012, one month at a time.
January:

February:

March:

April:

May:

June:

July:

August:
Week 34: A Home For My Jewelry

October:
Our Dining Room Table


December:
Week 49: The Tiniest Little Purse

Week 34: A Home For My Jewelry

September:

Our Dining Room Table

November:

December:
Week 49: The Tiniest Little Purse

Wow! That was way harder than I expected. So, because I can't leave these out, here are some honorable mentions:
 |
| Bamboo Drama |
 |
| Beaded Necklace |
 |
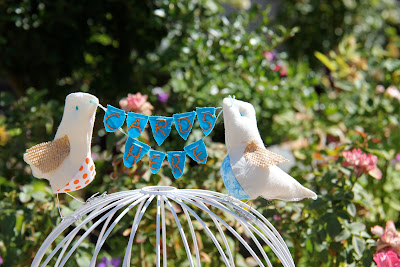
| Turkey Love |
 |
| Finger Puppet Parade |
 |
| Anniversary Art |
 |
| Frame wall |
 |
| Skulls |
 |
| Honeycomb quilt |
 |
| Beach Washed Christmas |