Showing posts with label Gourds. Show all posts

Thursday, November 1, 2012

Week 42: El Dia De Los Muertos

 Happy Halloween/ Dia De Los Muertos/first day of November!  This was supposed to be a Halloween post, but I was in a exhausted-zombie state last night.  I barely made it to dinner before throwing myself into bed. 

As it turns out though, today is a more appropriate day to post pictures of these skull planters, and the festive section of my living room. :)

My sister is a Halloween baby, and decorates some parts of her life (like her leg) with Dia De Los Muertos skulls. I saw an idea for skull decorated planters on the internet a while back, and stored it away as a gift idea. I made my planters out of tin cans, cus I had some.
 This one is hanging out with Turkish-gourd-Alan (one of our wedding cake toppers), and a skeleton. 
And a mini pumpkin stuck in a pot.

I got the skeleton garland at the dollar store, the one store where I still buy random crap I didn't go in for. 

This guy is sitting on my FAVORITE pumpkin ever/Alan's most hated pumpkin. It's called a peanut pumpkin because it looks like it has peanuts growing out of it.  I think it's the most beautiful thing ever.  I may be the only one. 

Turkish-gourd-Erin made it to the party too! As did the photo booth sign from our wedding, because every good table display needs some old wood.

My favorite skull.

A stack of old Reader's Digests added some depth, a butternut squash and an empty bottle of pumpkin cider add some height.

Spiky hair skull is sitting next to two more beautiful pumpkins.  Who am I kidding?  I love all pumpkins.  SO MUCH.  They're all beautiful.

The pumpkin behind this skeleton is called "One Too Many."  Not sure what they mean by that.  Cus no amount of pumpkins could be too many.  Right?

Just loving this spooky little place. 
Boo!

Friday, August 3, 2012

Week 28: Happy Anniversary

July 30th was our one year anniversary.  Woohoo!  We have had 365 days of laughter, love, adventure, and tickle fights.  Definitely the best year of my life so far.  I love everything about the man I chose to spend my life with, and I'm so thrilled about what the future has in store for us. 


With wedding season in full swing (5 friends getting married this summer), we decided to get away for just one day.  So we packed up and headed to Placerville, because neither of us had been there, and because it was so close to the wedding we were at the night before. We stayed in the historic Cary Hotel, and explored the little town and Apple Hill.  It was perfect.  


For gifts, we decided to go with the traditional first-year-gift of paper. Also, we made the rule that it had to be homemade (my favorite rule). 


I used one of my favorite pictures form our wedding ("The First Look," above), traced our silhouettes onto some card-stock, and used an Xacto knife to cut us out of it.


Then I taped our silhouettes onto the inside of the glass on an extra deep frame.  Then I turned the frame into a shadow box, by cutting out a piece of cardboard that was too big to fit inside the frame.  I glued a list of all of the adventures we've had in the past year to the front of the cardboard, and then super-glued the cardboard to the back of the frame.  Then I super-glued a soda can top to the back to use as a nail holder (thank you Pinterest).

I love the idea of this gift.  I love the picture of us. I love the record of our first year in adventures.  And I love that I already had all the materials at home, so it was free!  

I don't love that the tiny bit of tape I used on the silhouette, failed after I super-glued the back on.  GRRR... Fortunately it was still looking good when I gave it to Alan.  Also, we don't have a wall to hang it on yet, so when we find a permanent place to live, I'll fix it, and then hang it. 


Alan re-used a sign from our wedding (love that guy). He added some eye-hooks, and some wire...

And hung two frames from the bottom that hold our vows in them (there's the paper). 
Exchanging vows was one of my favorite wedding day memories, so it will be so lovely to have them displayed on our wall as a daily reminder of all the promises we made.

As if that wasn't enough, he had another surprise waiting for me at the hotel...
He secretly sent this picture of our wedding cake toppers (mini Turkish gourd people) to a local cake maker, and she did an amazing job of recreating them!  Her gourds aren't gourds at all, they're perfectly painted marzipan! Stunning!

Cake re-make!


Alan, thanks for making this year so special!  You're my favorite.

Sunday, May 27, 2012

Week 21: Gourd Light- Bitti!

My fingers ache... there are seed beads ALL OVER my house... and my back is sore from sitting hunched over a gourd for three days... But my lovely gourd is finished (or bitti)! 

Ohhh...

Ahhh...

That's what you were thinking right?

Now that my gourd is finished, I know why I never see them made with seed beads. 
First of all, none of them are uniform in size.  They are all slightly different, which means a bunch of slightly different sized holes.

Secondly, they aren't spherical.  Sometimes the hole is facing out, sometimes the side is facing out, and sometimes it goes in all wonky.  Makes for a rough looking surface. 

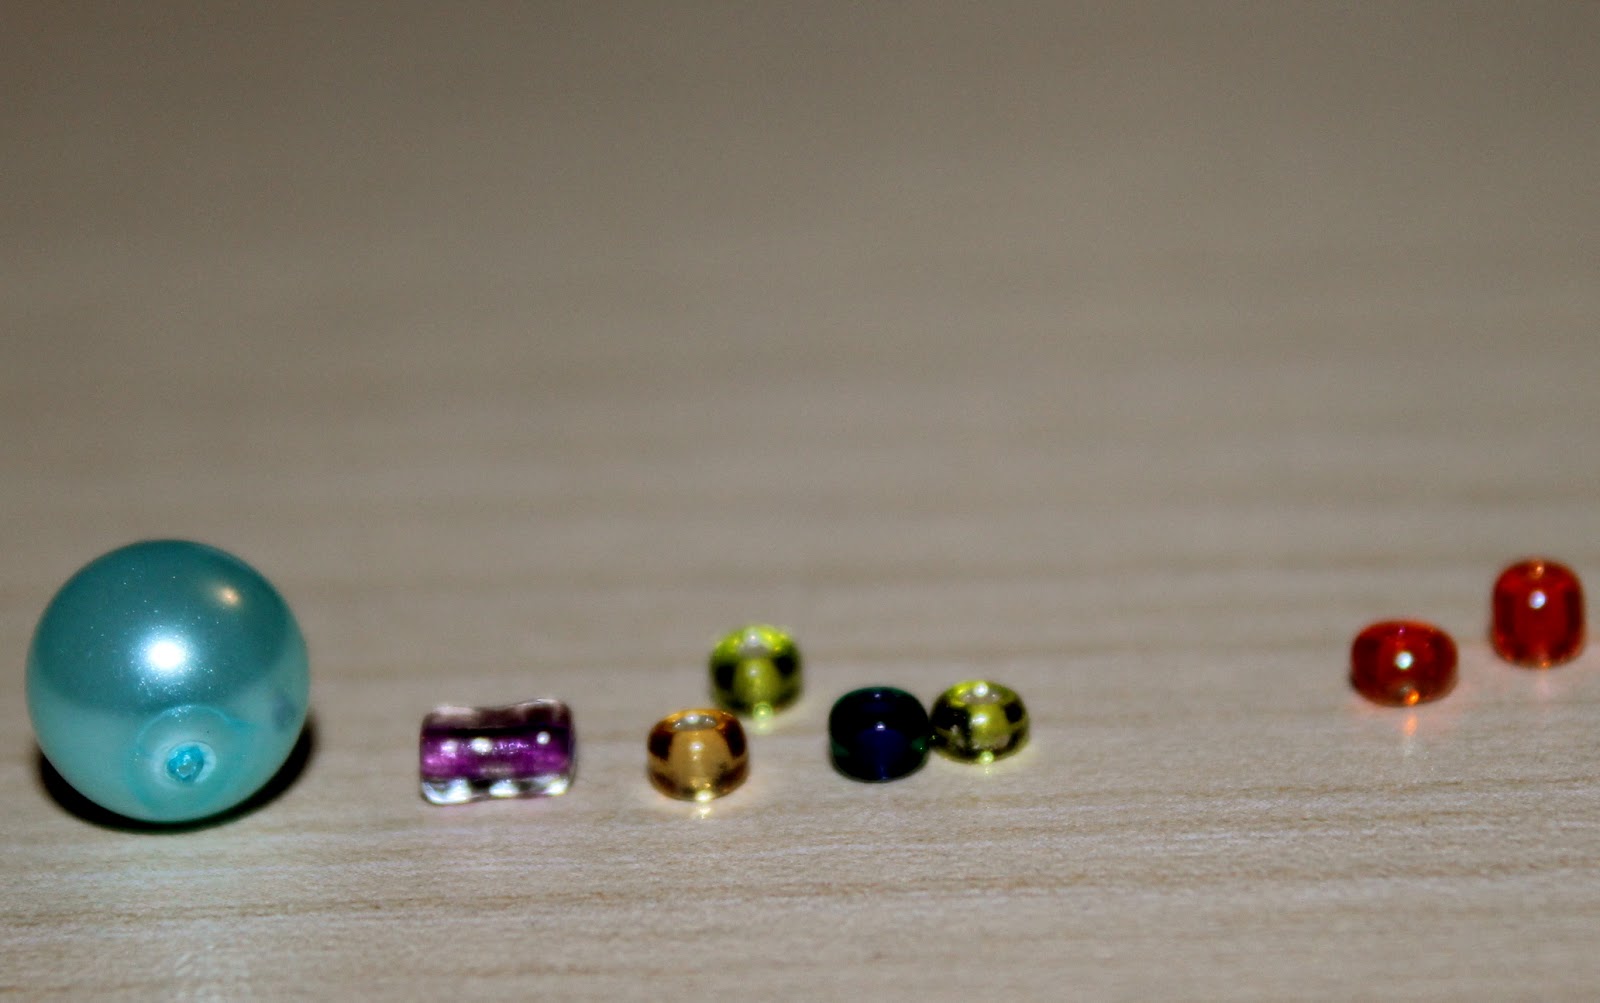
Thirdly, seed beads are SO SMALL! I probably had to use two or three times as many beads as I would have had I used the right kind of bead. And my fingers are really angry. 
The bead on the left is the approximate size of the right bead. Notice that purple bead.  This is the kind of random bead sizes I'm working with.
If I ever make another one, I'll try to use the right beads, (and drill bit). That being said, I love how it turned out.

Sunlight...

Bulb light...

Candle light...

Gourd-geous.

Sunday, May 20, 2012

Week 20: Gourd Lights- Part 2

For Week 18, Alan and I picked up some gourds and got to work cleaning them out and designing a pattern"We" may not be accurate. Alan is waiting for inspiration.  

I left off with some outlines of flowers, and a plan to come back to it with a bigger drill bit to make holes the right size for beads.
Part 1

Unfortunately, our super-awesome-drill-for-19-lira only comes with one size drill bit, and none of the other manufacturers' bits fit.  Bummer.  So Alan had the great idea to just buy some screws that were the right size and use those as drill bits. Too bad he is TERRIBLE at estimating the right size of screw.  The ones we ended up with made the same size hole as our drill bit.  I was super frustrated at this point, and put the gourd on a time-out in our spare room, with all of my other crafting materials.

Two days later when I went in there to find a t-shirt, I was in a better space. And I saw that little gourd in a whole new light.  Sitting right there next to the gourd were seed beads left over from some jewelery making. And wouldn't you know it? They fit perfectly!  Now I don't even need a new drill bit, I just need to get drilling. 
Seed Beads to the rescue!
So I did!  I drilled the heck out of that little gourd.
  Filling in the flower petals...

 Adding a ton of holes to the top (to cover up an extremely unattractive flower I thought I could free-hand drill)...

And adding some tiny flowers around the bottom. 

Then I contemplated colour. I loved the natural colour of the gourd, but there were some rather nasty blemishes, so I felt like I had to paint it.  I went with a creamy base, and gold accents.  I love it even more now.

Part 3 will involve me filling each and every hole with a bead.  I've started the process, and now know why these lights are so expensive.  Parts 1 and 2 were cake. THIS ONE IS NOT. It involves re-drilling each hole to get the paint and crud out, and then maybe finding out I drilled too much, and re-adding the paint.  Grr.  Also it involves me pushing really hard on itty-bitty glass beads. A million times.  My fingers are not pleased.

  But I have a feeling it will be worth all the pain...

Monday, May 7, 2012

Week 18: Gourd Lights- Part 1

When we moved to Turkey two years ago, I fell in LOVE with the beautiful gourd lights I found hanging in many shops.  Falling in love with gourds is nothing new for me.  They are my absolute favourite fall and Halloween decoration, and I have acquired some mini versions that are some of my favourite Christmas decorations.  I have a gourd addiction that I have no plan to recover from. 

We brought several gourd lights back to America with us that we used over our dance floor at our wedding.
Dazzling, wouldn't you say?
 Well... If you know me at all by now, you know that the second I spied these beauties I figured I too could make them. I spend most of my time in gourd shops studying designs, and figuring out how they are made.  I have a dream of becoming a gourd artisan some day.

I've been putting this dream off, because we didn't own a drill, and those holes are all drilled.  I've wanted to buy one, but we've resisted for the sake of not amassing things we will have to get rid of when we move home. 

But last month the bed broke, and so did our will-power around not buying a drill.  
So naturally we better make good use of that thing!

So, while visiting the castle with Alan's family last week, I stopped in to say hello to my gourd lady, and picked-up these two lovely things for a total of 4 lira. Score.

Then I wasted 3 hours of my day looking for the freaking Leatherman. 
But then I found it. (phew)
So. Tools for step 1:
Saw of some sort, sand paper, sketch pad, scissors, pencil, and cute little drill with varying bits. 

 First: cut rather large hole in the bottom of gourd. Sand smooth.
 

 After cutting off the bottoms (and finding inspiration for a later craft called "gourd bikini")...

 and removing the seeds (or as I like to refer to them: "my future gourd farm")...

You're left with this.  This hole will allow you to attach a light bulb, or maybe a tea light candle. 

Next: Sketch a plan.  Cut out a few shapes you can trace, because sketching on a rounded surface is very difficult.  I traced a leaf like shape, overlapping three times, to make a flower shape. 

Use the thinnest drill bit you can find to outline all of the designs.  These holes wont have colour beads in them, they will just be specks of light.

I just followed the lines drilling as evenly as I could. 

Sometimes it got wonky. 

But mostly, I love it. 

Unfortunately our baby drill only came with one drilling bit. Bummer.  So our next step will be finding the right size bit for bead holes. And purchasing beads. 

But the first step of this project was surprisingly more simple than I was expecting!  All told I spend about four hours on this baby, and three of those were spent finding the Leatherman. (I put it away more carefully this time.)

When we find what we need I'll fill all of the petals with bead sized holes, and add some more little shapes between the flowers.  

Also I'll paint.  

Then I'll add the beads, and we will all sigh at it's splendid beauty.  I'm sure of it.

To see the rest of the drilling, and the painting go to part 2.

And to see the completed project.. Part 3!