Showing posts with label flowers. Show all posts

Thursday, October 11, 2012

Our Tiny Garden

Two weeks ago, our plan was to skillfully turn a couple of free pallets into a dining room table and matching benches.  I had suprisingly little apprehension for a person who owns NO TOOLS, and possesses NO SKILLS. 

Alan had enough apprehension for both of us.  But he was managing to be supportive.  He even "blue steeled" it when I took a picture of him sawing the pallet in half by hand.  He's amazing.
A week later we scored some amazing dining room furnature and gave up on the idea to turn that pallet into benches. 
So we were left with a sawed in half pallet... and Alan's dream of a garden.

He took the two halves, flipped them on their sides, and screwed them together using some scrap wood from the hardware store.  He lined the bin with some shade material and filled it with compost and lovely eatible plants.

Red Lettuce

Pansies

Basil

Spinach

Dill

And Rainbow Chard (Yes!)


Total Time and Money Invested:
Around 2 hours
Pallet: Free on Craigslist
Screws: Already owned
Wood Scraps: Free
Shade screen: $6.00
Compost: $5.99
Plants: $10.00

Total: $21.99


Saturday, September 8, 2012

Week 36: Flouncy Rosette Apron

I just love rosettes. 
I have another friend getting married this summer, and like all of my other girlfriends, I decided to make her an apron for her shower gift. Again, not because all wives should be in the kitchen, but because aprons make cooking, cleaning, hostessing, and all other activities cuter.
I made a bunch of little rosettes for this apron, all out of scraps of fabric I had. I happened to have a bunch of scraps in her wedding colors.  Score!
Each rosette was made with 2 inch wide strips, folded in half (hotdog style) and sewn using a basting stitch.  I didn't bother sewing inside out and flipping, because I was going to hide all the seams when I spiraled. 
The smaller rosettes were made with a 6" (ish) strip, and the larger ones were made with three or four 6"  strips. 
After basting, I scrunched by pulling one of the threads almost all the way out.  (Note: Make sure to back stitch at the beginning of your basting stitch, so the thread doesn't come all the way out.)
Once I had a pile of ruffly scrunched pieces, I started curling them into rosettes.  Once I liked the look of them, I pinned them into place. I sewed them on to circles of muslin that were just slightly smaller than the rosettes.  I machine sewed, starting with the outside round, sewing so that the folded edge of the ruffle overlapped the seam on the previous round, by a centimeter or so.
Once all the rosettes were made, I attached them to the body of the apron using buttons from my stash.  (The apron body was SUPER simple this time.  I took a piece of muslin about 2' wide, and 3' tall, folded it in half so that it was 2x1.5, sewed up the sides, flipped and ironed.  I left the top open, so that I could do all the hand sewing from the inside.)
 I embroidered her new name a few inches from the top of the apron...
 
used a basting stitch to gather the apron top (shrinking it to about 1'5 at the waist), and then sewed a ribbon on as the waist band.

Monday, April 30, 2012

Week 17: Castle Flowers

I'm struggling to keep up on my crafting goals while still playing hostess and tour-guide to Alan's family.  So today on an absolutely stunning walk on our castle hill, (possibly one of my all time favourite places) I stole Alan's fancy camera and tried to capture the rainbow of flowers around me. 

Though I am not a photographer, professionals would certainly say that photography is a craft. I'm sure they would also look at the photos below and say that I'm doing it wrong.  That's OK, I'm a firm believer in learning by doing, and that no craft has to be perfect. 

I'm a weed lover.  All of my favourite flowers are weeds, and will probably be banned from Alan's  immaculately planned garden.  I have no patience for gardening, so for now the guy who tends it gets to make the rules, and he says "No weeds."  Boo.   

So all of my pictures are of gorgeous weeds.  I dare you to look through them and not fall in love yourself.

Red Poppies...

Orange Poker...

Yellow... Clover?...

Something else yellow and tall...

Green climbing fern...

Green succulent...

Blue Iris (OK, not a weed, but growing like one)...

Deep purple centers...
Dark purple shamrocks...

Something bright pink...

Pink Hollyhock...

Neon pink succulents...


The most beautiful white weed EVER...

And a dandelion the size of an apple.

Monday, April 16, 2012

Week 15: Embellished Cardigans

 One of the first blogs I became obsessed with was New Dress A Day.  In case you aren't also obsessed, I'll fill you in a bit.  Marissa challenged herself to a year of crafting her own clothing, one item a day.  In the entire year she was only allowed to spend $365, or a dollar a day on these new items of clothing.  Nearly everything she made was an upcycled thrift store find, or something that she already had in her closet.  She has a gift for turning something hideously un-wearable, into something fab. She is my idol.  I want to be her. 

Anyway, her challenge is over, but I'm still inspired.  Unfortunately I am challenged by a few details: 1. I live in Turkey, where there doesn't seem to be any such thing as second hand stores. 2.  Fabric and craft stores are very limited here. 3. My sewing machine lives in America.

So.  Last spring I chopped into a few Banana Republic sweaters that I didn't love anymore,  and turned them into cardigans.  

Sorry in advance for all of the PJ pictures.  It was Sunday morning, and I didn't feel like getting dressed.  Or brushing my hair.  So I just cut my head out of everything.  

I embellished this one with some lacy trip that I found at a yarn shop. 

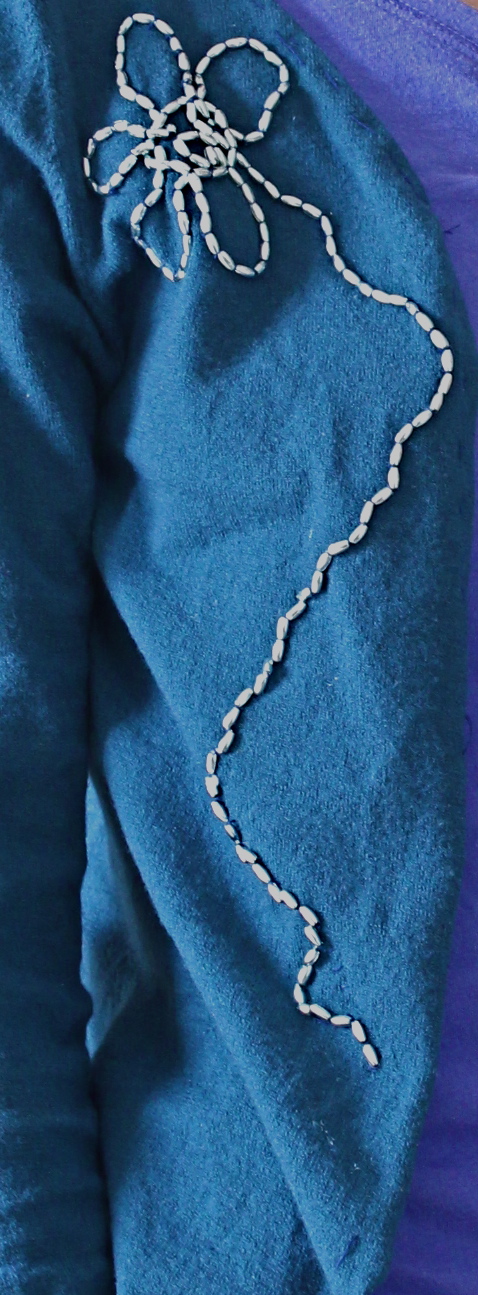
And I added beads to this one, in the shape of a flower.  

Close up on the flower.
Don't look too closely at anything else, because without a sewing machine, my  edges are pretty rough. 

Anyway, a few weeks ago my best Turkish buddy, Zeynep, was admiring my flowered cardigan, and asked if I would fancy up one of hers.  Heck yes.

So she brought a bag of cardis to work and told me to do whatever I wanted.  An hour later she ran into the office to clarify. "Don't change all of them.  Just one."  A few more hours passed, and she ran back in, "don't do anything too big or too noticeable. Maybe just a tiny heart."   

Seemed like Zeynep was starting to trust my creative eye a little less. 

So I sat on her bag of cardigans for a week.  Trying to figure out how to just add a tiny heart, and still make it super cute.  What's the point of that?  So I gave up, and ignored her request, promising myself I wouldn't be hurt if she wanted me to take it all off.  

Here's what we started with: Plain gray, shorty, cardigan. Super soft though.

I cut a bunch of tiny flowers out of Alan's old shirt.  (I'm getting lots of mileage out of that guy: flower wreath, birds, headbands, whale onsie.) And laid them out to get a feel for the placement. I ended up cutting out 8 each of 5-petal and 4-petal flowers.

I wanted to add some dimension to them instead of having limp flat flowers, so I folded the flowers in half and sewed a knot in the back, and then I folded them in half again and sewed another knot. 

This helped them to stand up just a bit. 

I sewed them on using seed beads left over from all of my necklacing.  

Final product.
 

Her reaction: "I love it it's perfect!... And what about the others?... Let's see the others!
Me:  You only wanted me to do one. 
Zeynep: But now you can do them all.  I changed my mind... Where did you buy these flowers?
Me: I cut them out of an old shirt. 
Zeynep:  Hmmm... We should open up a store.  In Istanbul.  People would buy these.  Think about it.

I guess she liked it. 

Stay tuned for the rest of the cardigans she gave me.  

Friday, April 13, 2012

A Home for Some Birds


Last night I made them a lovely home.  I used my trusty Real Simple magazines, and some scissors, and viola! Simple shapes cut into stacks of 8 at a time.  No time at all...

 Long skinny petals on star shaped flowers... 
Fat petals on cloud shaped flowers...
And circles with fringe cut all the way around for poppy like centers...
(See those beads?  They needed a hiding spot while they're waiting to be strung on something. But they're just too pretty for the inside of a drawer.)
 Some left over twine made for lovely stamen.
 

 Smaller versions of the same flowers made a lovely garland.

 A yarn needle, and some yarn easily strung all of the paper blossoms together.

This little bird likes his new home. 

This little guy does too. 
(My friend Sonya made these coiled REAL Simple coasters.  Wilbur stands easily using a pin stuck into the coaster and into his tummy.)
 These two are admiring my castle sketch, while reading up on "Love that Lasts." 

Spring has arrived in the spare room. 

Sigh.

Monday, April 2, 2012

Week 13: Celebrating Spring!

Spring is here, and I couldn't be happier.  I LOVE warm weather, and sunny days, and waking up to the sun, and arriving home when it's still day light.  I love spring skirts, and dresses, and sandals, and bright colours.  I love the flowers and seeing the leaves grow back on the trees.  I love eating meals on our balcony.  I love not having to wear a jacket.  Spring is the best!  

Note:  Summer used to be the best, but then I moved to Turkey, and learned to LOVE this in between weather.  In a few weeks summer will arrive in Alanya, as will daily swims in the sea, which are my FAVOURITE thing.  Unfortunately, summer also means sweating through all of my clothes the second I put them on. It means showering two or three times a day to keep this Italian skin from feeling like an olive oil factory.  It means that I lose control of all emotions when we are outside, and I pace like a caged animal when expected to wait more than 30 seconds for anything.

Suffice it to say, I no longer see Spring as yet another month between me and Summer.  No.  I've learned to appreciate this beautifully bearable season. 

To celebrate it's arrival, I'll focus all of this week's posts on Springy crafts. I hope to spread the fever. This is one you'll enjoy catching.

I'll start off with some super easy headband embellishments.

I had this plain old headband left over from when I ripped the GIGANTIC flower off of it, to use on my spring wreath. The flower was cute, but every time I put it on, I felt like I had a bush growing out of my head.  Just too big. 
I also used this skirt-turned-dress project that I never really liked.  Too short to be a dress, to flouncy to be a shirt.  

 Super fun fabric though.

 And a shirt we bought Alan at a second hand store.  My favourite colour, but it fit far too tightly. 

 With the plan to make rosettes, I cut each fabric into a long strip. 

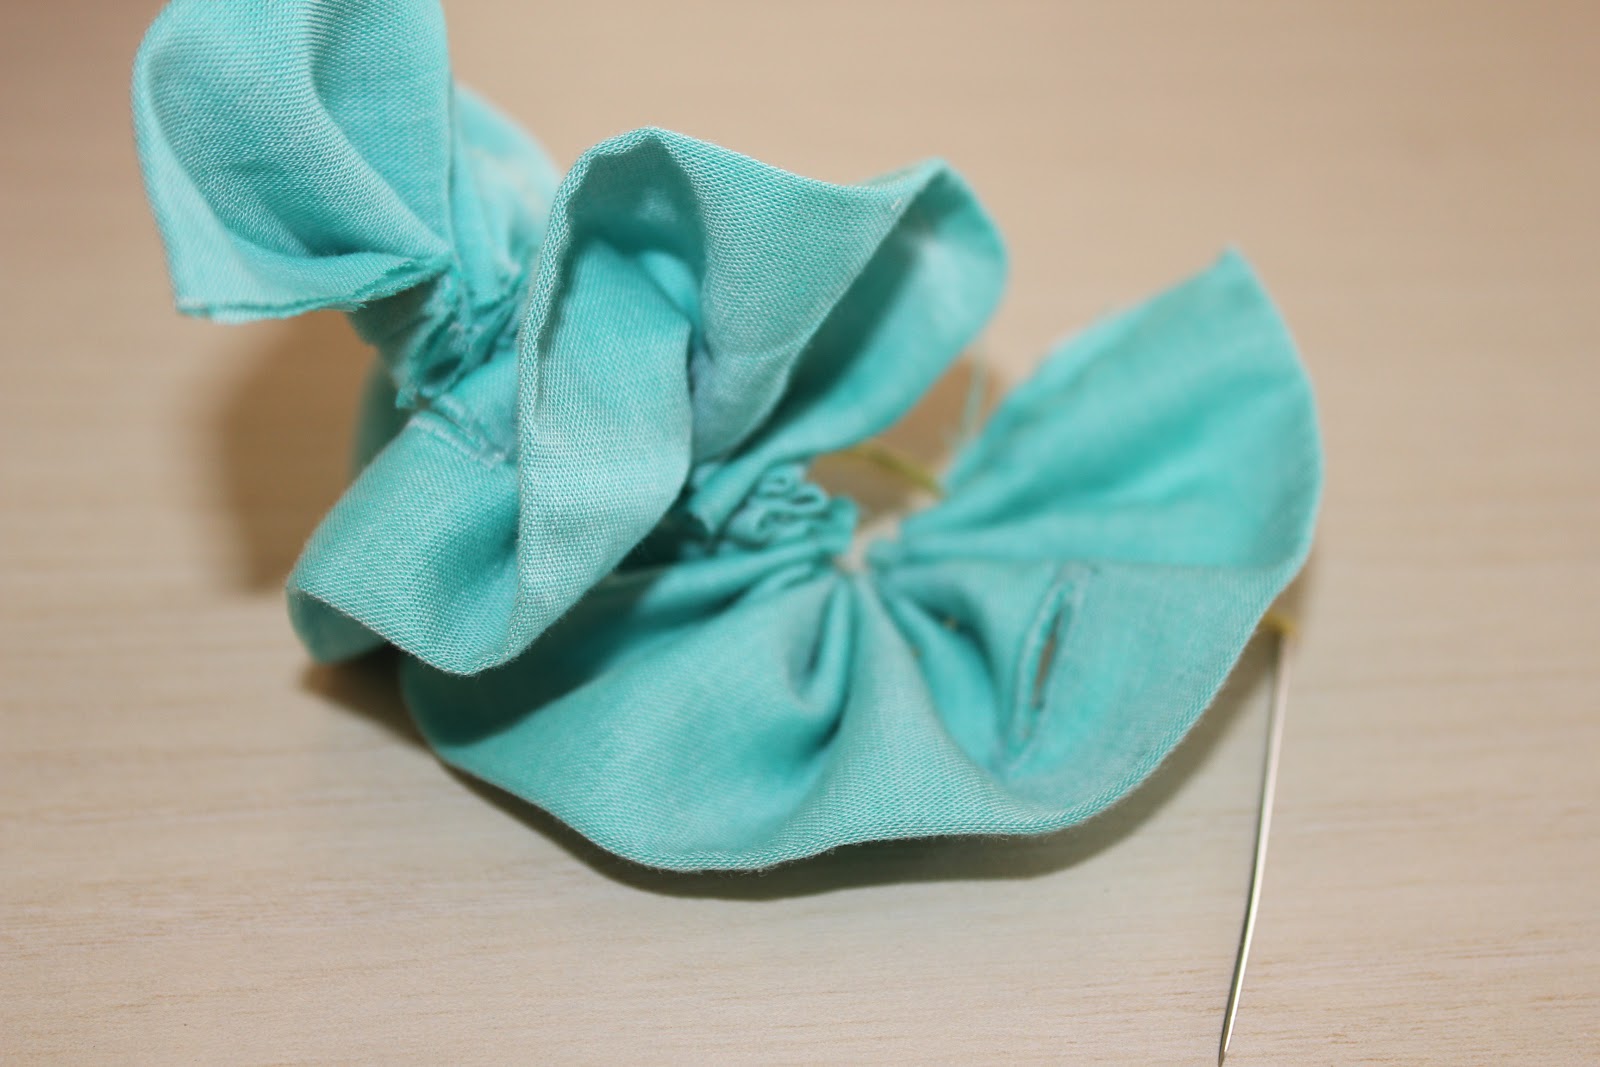
 Then I folded the strip in half, and ran a running stitch down the open end, gathering as I went. 

 I gathered it into a spiral, an used the thread to tack it all into place.

 A button off of the same shirt made a lovely center. 

 Lastly, I sewed a circle of fabric on, to hide the mess on the back, but also to make a little channel for the head band to slide through.  I could have just glued it in place, but thought why make one headband when I can have many?
 I did the same with my dress material...

 Used a left over bead for the center...

 And a scrap of hem for the channel...

 It slips on in a quick second, and my head holds it in place. 

 So... plain black headband...
 Pink flower...
and aqua flower...

Three headband. 30 minutes. $0. 

I'll continue to come up with more embellishment possibilities, because the world is my oyster headband.

Happy Spring!