Showing posts with label Baby. Show all posts

Thursday, December 13, 2012

Hexagon Quilt Finale

Finished!  Finito! Bitti! Done! phew.


 "What did you finish?"  You might be thinking... 
Just kidding.  With the amount of posts this quilt has earned, there is NO WAY you're thinking that. 
But just as a refresher...

The quilt where I had to use a homemade protractor, and lots of math equations to cut hexagons and triangles that would actually fit together the way I imagined...

 The one with the stripe of triangles across the back...The one I hand quilted...

 Well I bound up the edges.  I really wanted to hand bind it, like my amazingly talented grandmother.  When I look at the binding on her quilts, I can hardly see a stitch.  Even when I really examine.  I want to be that good some day.  Unfortunately today is not that day.  I sat down with every intention of hand binding, and it was a disaster.  I'm just not as patient and talented as she was.  Yet. So I got out the sewing machine.  And the zigzag stitch method worked, it just isn't nearly as pleasing to me.

As I was photographing I had to laugh at the layers of quilts on our bed.  From top to bottom: My grandma's wedding ring quilt, Alan's T-shirt quilt, Diana's log cabin quilt, and new baby's hexagon quilt. So much love. 

All tied up and ready to go. 

My little bundle of joy for theirs. 
We can't wait to meet you, little one!

Sunday, December 9, 2012

Week 47: Hexagon Quilt Back

 I took a few weeks off from the baby quilt I'm making. Remember it?  Yellow and gray with hexagons and triangles?
Last night I finished the back of the quilt, and hand quilted the front and back together.

I added a stripe of triangles across the center of the back.  I was just too in love with the fabric to not add some of it to the back. 

To quilt the sides together I used a running stitch around each hexagon, yellow around the yellow hexagons, and gray and white around the others.


The quilt front has a gray rectangle border around the edges. I used gray embroidery floss around the edges of those rectangles. 


The quilt isn't done yet.  I still have to bind these scrappy looking edges...

Something to do tonight...


Sunday, November 25, 2012

Week 45: Hexagon Quilt Front

 Last week I got started on a baby quilt for a friend of mine.  I had some issues with geometry, but I flexed my math muscles and ended up with a bunch of hexagons and triangles that were ready to be fit together into a quilt.
 To start piecing, I added two triangles to each hexagon, making parallelogram blocks (more math!), like above.  When piecing a quilt together, you always want to work with straight seams like the ones I have above.  The triangles fit onto the hexagons with a straight seam, and the two blocks above will fit together with a straight seam...

And when I line them up like below, and sew all of those straight seams...

I end up with rows that can be sewn together with straight seams. (This concept has come to me gradually.  Being a person that usually makes her own patterns rather than buying someone else's, I've had to do a lot of problem solving.  Believe me when I tell you that sewing around a corner to fit a block in is NOT FUN.)

I made six rows like the one above, each consisting of six hexagon blocks. 

I didn't even notice that this pattern ends up making lots of Star's Of David, until my mom pointed it out.  

Perhaps I should have used more math planning... because two sides ended up looking like this... NOT lovely.

But not to worry... I used my rotary cutter to get rid of all the extras, with a few nice quick swipes.  (Have no fear. Most of the extras will get used in the quilt back, so they aren't all wasted.)

Four straight sides.  So much better. 

Lastly, I added some strips of chevron, and some gray rectangles to the borders to make it look more clean and finished.  


Next up: backing, quilting, and binding...

Monday, November 19, 2012

Hexagon Quilt Math

 I'm making a baby quilt! Baby quilts could quite possibly be my absolute favorite craft. I mean babies: ADORABLE, quilts: BEAUTIFUL, baby quilts: PERFECT.  

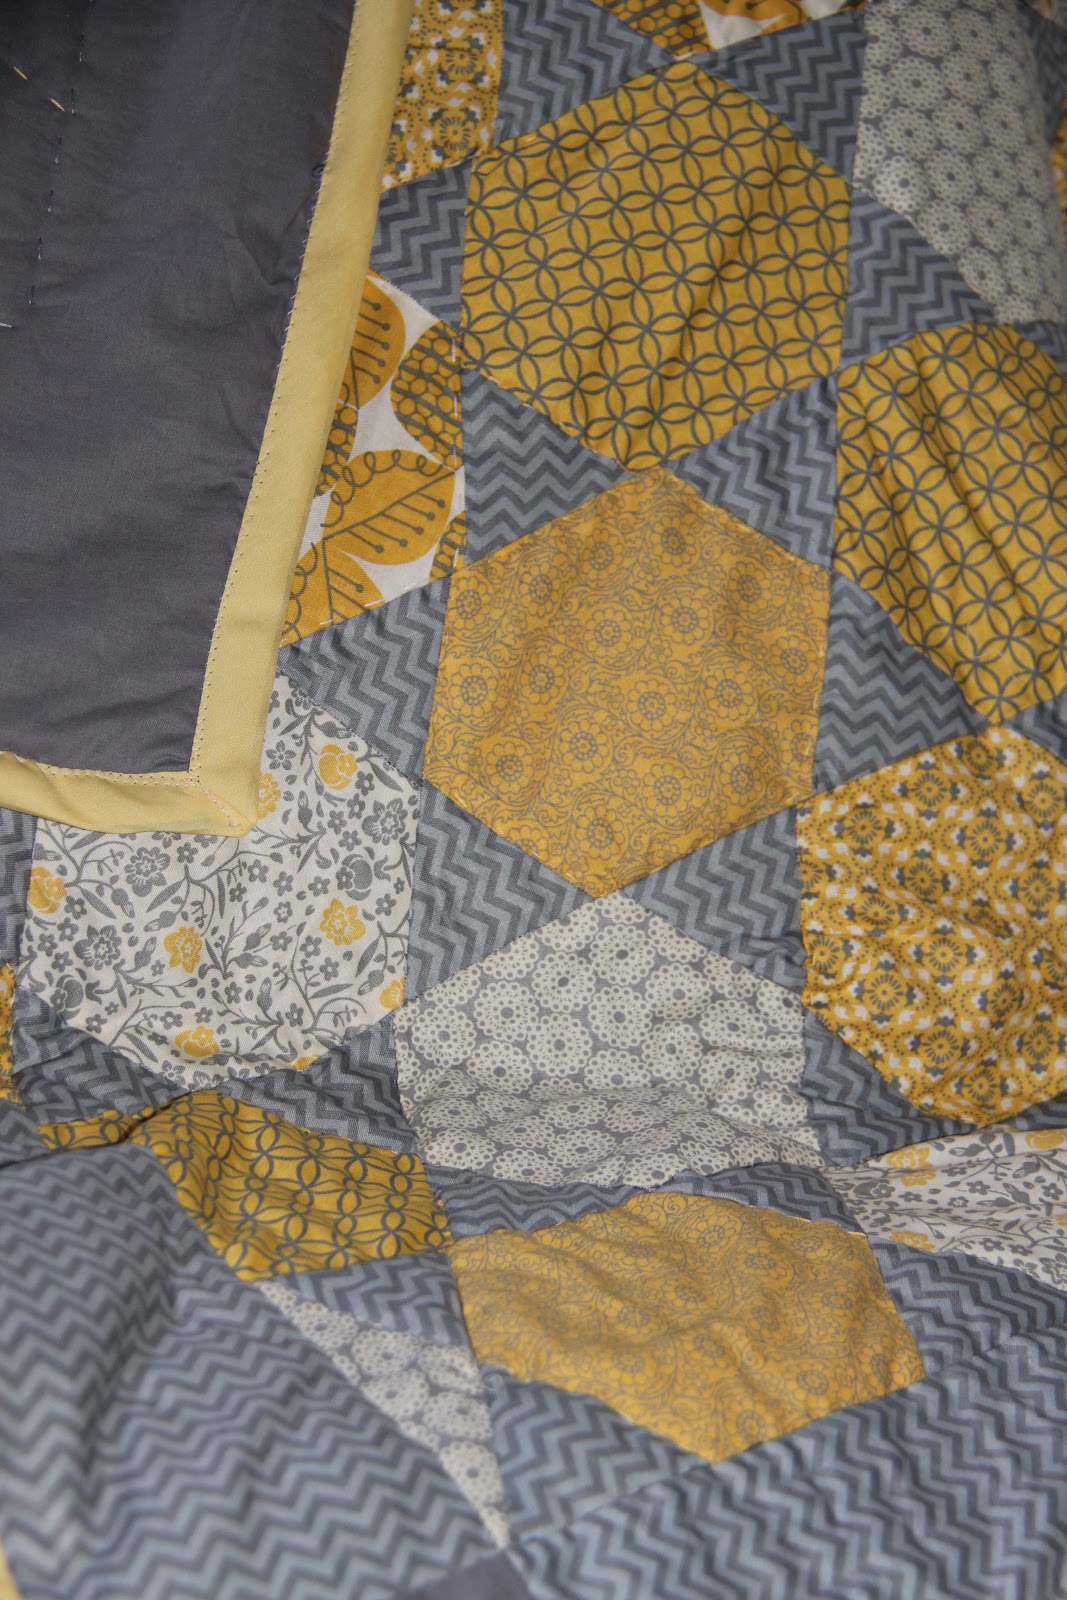
I had a vision for this one.  A vision of hexagons and triangles.  But no pattern.  Which is cool, because I hate patterns. But I knew that the hexagons and triangles needed to be perfectly regular on all sides, and at every angle, and I knew I couldn't free hand that.  

So I sat down and tried to problem solve some sort of geometry equation that would help me with this challenge.  It turned out I didn't remember enough from my 9th grade geometry class. 

Lots of math comes next.  Most people don't think math is pretty, so I'll inject some gorgeous fabric shots to keep it appealing.
 

After doing some brief internet research I learned more about hexagons, and came up with a plan for making one that's perfect... 
I learned that every regular polygon (or hexagon) has two circles related to them, an inner and an outer.  The outer circle is called the circumcircle, and is the one that could help me. The radius of this circle is the distance between the center point of the hexagon, and one of the corners.

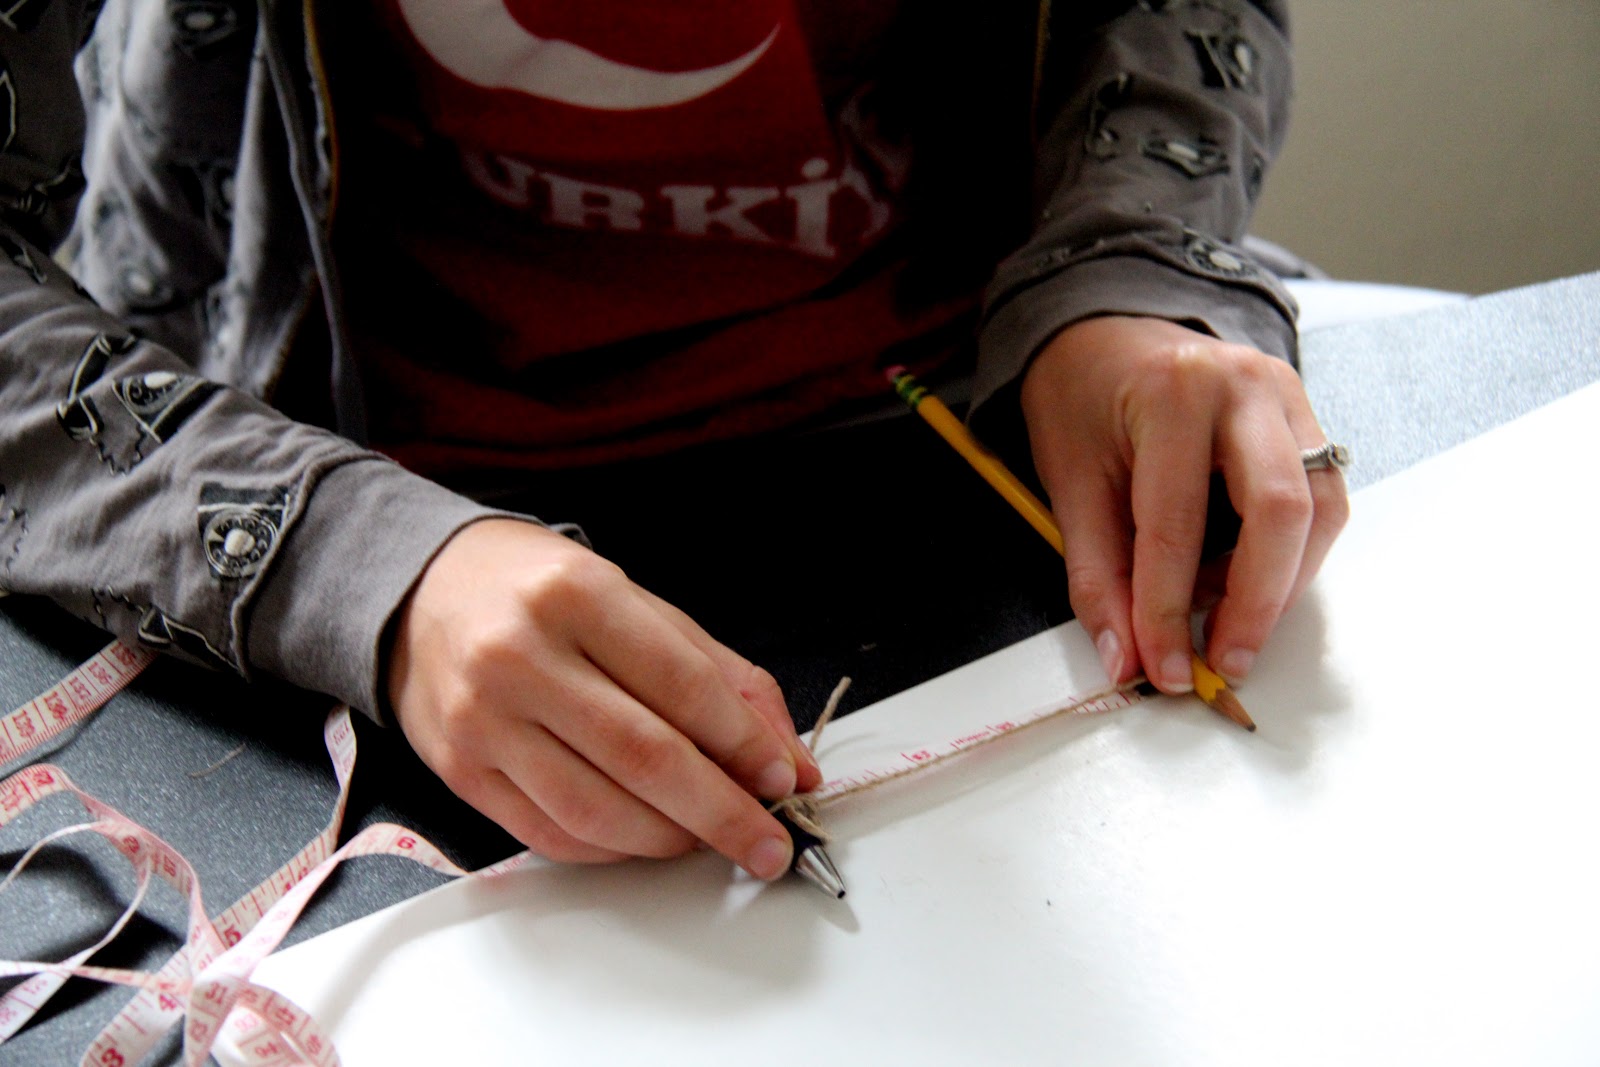
So, step one was to make my own compass:
 I used a pencil, a pen, some twine, scissors and a measuring tape. 

 I tied the twine to the pencil, and decided on a 4 inch radius.  I cut it a little long, and then tied the pen at the 4 inch mark. 

I figure we're in need of another beautiful fabric break.   Ahhh....

Ok.  Back to the math.  I used the pencil to make the center point, and swung the pen around it, drawing a circle on some tag board (I wanted something sturdy that I could cut around).

As it turns out, a regular hexagon has side lengths equal to the radius.  So the next thing I did was stretch the pencil and the pen apart on the line circumference and draw dots that were the same distance apart as the twine. Then I drew straight lines between each dot.

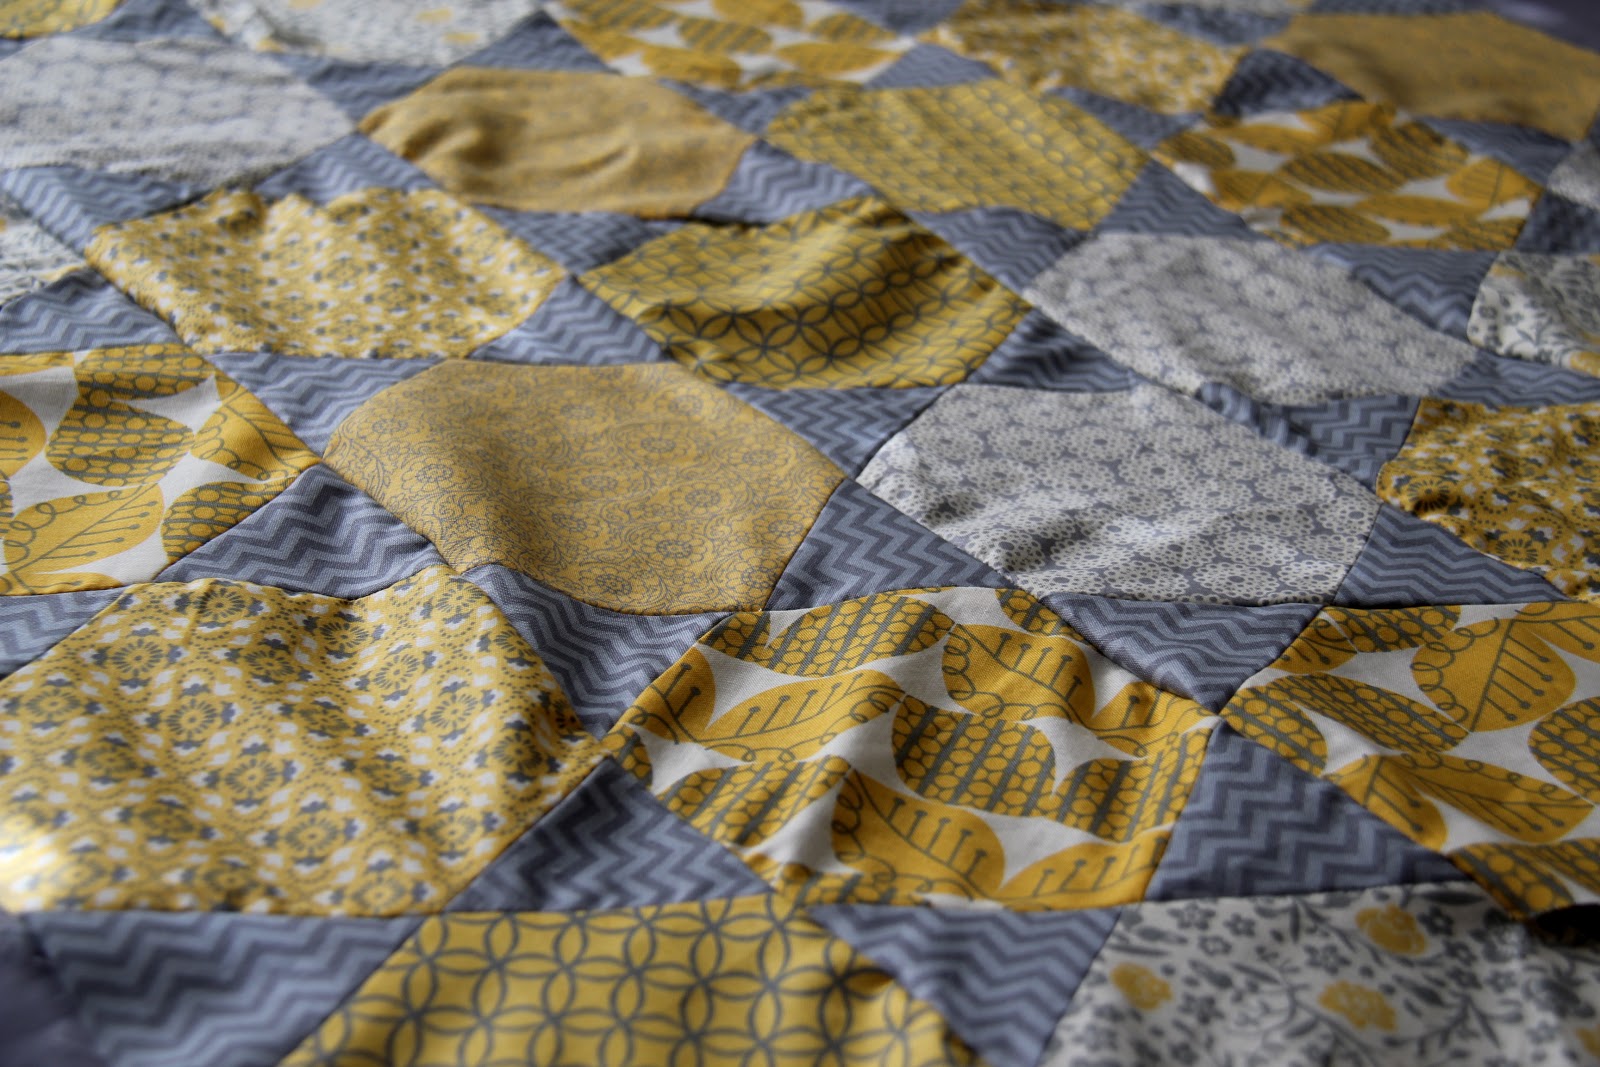
 Pretty, pretty, pretty.

Now for the triangle: I knew the triangle had to be equilateral, and that each side is the same length I've been using, so I started with an edge of the hexagon, and used the twine to pick a third point.  I had to try a few different ones before finding one that was exactly 4 inches apart on each side.  

Now wait.  I thought I had figured it all out. So I cut.  Bad idea.  This isn't exactly right. Don't cut yet.  I'll show you. 

I cut all my beautiful fabrics. (wrong)

Unfortunately I planned for the triangle sides and the hexagon sides to be exactly the same size.  And once seam allowance was accounted for,  I had triangles with bases much smaller than the sides of the hexagons. Big gaps mean that the hexagons all overlap each other by an inch on each side.  I only wanted them to kiss at the corners. GRRR.  How'd that happen?

OK. Look at the angles on these two shapes, when laid together to make a seam. Draw an imaginary seam line straight across the top, about an 1/8 of an inch down. See how the triangle's side gets shorter as you come down towards the point?  Now look at the hexagon.  Because the hexagon's angles go out rather than in, the hexagon's side length just keeps getting bigger. UGH.  One got bigger, one got smaller, and I got MAD.

Let's call it a learning experience.  I re-cut all my hexagons, cutting a half an inch off of each side.  Now the triangle has longer sides, but at the seam line, they have the exact same length.

And when I sew them together they make beautiful straight lines.
More later!

Tuesday, September 11, 2012

Blanket Ministery

We stayed with Alan's parents for a few days this week.  I was out of crafts, but itching for something to do with my hands.  Luckily, Alan's mom heads up a crochet donation group with her church.  Members of the church donated TONS of yarn, and Kitty has been collecting it to share with her group at the next meeting.  She let me pick some out to make a baby blanket to donate to the cause. 
 I used 5 skeins of yarn to make a 36"x36" granny square.  
I started at the middle, with a magic circle, and 4 little "bundles".  Each bundle is made of 3 double stitches, with 2 chains between each.  
 Each new row was made in a different color.  In the chain 2 spaces of the row below, crochet a bundle. At each corner add 2 bundles.
 As you can see, the down side to yarn donations is maybe not having enough of the right color yarn.
 I hope this blanket brings warmth and comfort to a new mother and her little one.

Monday, August 20, 2012

Week 32: Subtle Transportation

Another friend joins the mommy club this September.  Yeah for April and Reiner!  When I asked about a color scheme for baby Jaxson, she said that they weren't doing a color scheme as much as they were doing a subtle transportation theme. 

To go with the theme, I made a set of subtle transportation onsies. 
Can you tell what they are yet?

 I scooped up a 5-pack of onsies at Joann for $10.99 (score!), and the rest of the supplies were already in my possession...
Spray adhesive
Embroidery hoop, floss, and needle
fabric scraps

I free hand draw some pretty adorable animals, but for some reason, I have no ability to draw vehicles.  So I spent some time on google images looking up line drawings of boats, planes, trains...

This one was easy enough to just look at and free cut some shapes.  A running stitch holds them all on, and makes the waves. 

 The hot air balloon was slightly more challenging. I sewed all the pieces together using a sewing machine, and I'll tell you, sewing on those curvy lines isn't something I'll do again. 

But I absolutely ADORE how quilt-y it turned out.  (This one is my fave.)

The words on each of these was done using rubber stamps, and a textile medium mixed with an acrylic paint. Don't dip the stamps, but use a brush to apply the paint, so it doesn't get too gloppy. 
Once the paint is completely dry set it with a hot iron.

I also spread the paint onto the tire tread of a toy car.  Vroom. Vroom. 

I added some tiny matching cars onto the tire tracks.

Lastly, to my mom and Alan's delight, I made a mo-ped.  

I did this using freezer paper (you could buy it at the grocery store, or you could just go to the butcher and see if he'd give you some for free. Mine did!).
 I traced the outline of the scooter onto the paper, and then cut it out.  Then I used a hot iron to adhere the outside frame of the mo-ped to the fabric, and then painted in the center.  The freezer paper creates a tight seal so that the paint doesn't spread. I let it dry completely, and then pulled the paper off. 

I outlined the scooter with a back stitch.  

Congratulations April!  Can't wait to hold your little guy!