Showing posts with label Painting. Show all posts

Monday, October 22, 2012

Wall Week: Frame Fabulous

So, I've been looking all over for some HUGE and inexpensive frames to decorate the wall behind our bed. I was having so much trouble finding any for good prices... garage sales, swap meets, and the Goodwill were all over charging.

Just as I was about to give up, my darling friend invited me over to "swap meet" through her left over wedding decor, AND LOOK WHAT SHE HAD!  All. For. Free.  Gotta love her.


Most were in need of a good cleaning, and some desperately needed updating.  Nothing some paint can't fix.


Luckily, I happen to have all the colors in my gorgeous quilt as paints.  Apparently I love these colors.


So I freshened them up with some coats of paint that would go with the quilt,

and the lamps. 
And then I hung them on the wall in a somewhat random pattern.

LOVING how they turned out.  Also, bonus: we had an earthquake the other night and none of the frames shook off the wall and crushed our heads!  In fact, without glass and backings the frames are light enough to probably only bruise, rather than smash, our heads if they fell.  Though, that would probably be super scary.
Wall 2: Decorated for free, Yo!

Friday, October 12, 2012

Dining Room Seating


During our last weekend garage sale-ing adventure, we stumbled upon dining-room furniture that was just too good to pass up. While we had plans to make "free benches," out of an old pallet, the cost of the legs, hardware, and stress would have actually been way greater than what we paid for these three gems. 

This lovely little piano bench was only $8.  We were in love with the fun vintage fabric, which wouldn't actually match our dining room set.  But we knew we could use the fabric elsewhere when we removed it from this piece.

And these seat-less chairs were only a buck each!

Granted, they were gross.

And missing some very crucial pieces, but that didn't scare us away.

We soaped them down, and sanded all the rough spots, and then added a few coats of paint.

Already looking better.
Now for upholstering... Alan brought the chairs and the bench into the hardware store with him and got some pieces of plywood cut to the exact measurements.  Each chair needed one for the seat, but he also got one for the bench which already had a seat.  We painted this piece white, and used it to turn the bench into a storage space. More on that later.  While he was at the store, he also got a dowel to fit between the legs of the bench to help it's wobble factor.

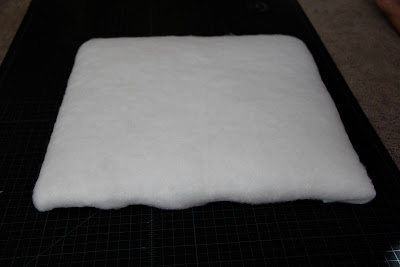
While the paint dried, we stapled 8 layers of quilter's batting to the seats.

Looking oh-so-comfortable, wouldn't you say?

And then we stretched and stapled some gray suede-ish fabric on top.

I know this is a crazy angle, but to get the seats to fit snugly onto the chairs I literally had to sit on them while Alan laid underneath and drilled from the bottom.

Don't the chairs look SO MUCH CLASSIER?

For the bench, Alan drilled the painted plywood into the underside, flipped it over, and attached the seat with some small hinges, to allow us to flip it open.  

Then he had a stroke of genius.  If we were going to be flipping the bench open all the time, the backside of that seat should be adorable too.

So he added some amazing, bright, vintage sheet fabric we scored a few weeks back. To avoid visible staples, he used an iron-on fusible to attach it.


PERFECT!


Total Cost and Time Invested:
 3 or 4 hours
 Furniture: $10
Sand paper: Free (already owned) 
Screws: Free (already owned)
Plywood +Cuts: $8.19
Paint: $14.99
Dowel: $4.59
Batting (garage sale): $0.50
Gray Fabric (cut from a garage sale curtain): $0.50
Bright fabric (Cut from garage sale sheets): $0.50

Total: $39.27

Tuesday, October 9, 2012

Lamp Love

Remember when we scored these ugly lamps for $2.50 each?

And they were disgustingly covered in animal fur?
Time for a remake!

Supplies:  
Cream colored spray paint:  Free (already owned)
Rit dye in blue and green: $2.60 at Michael's
Sand Paper: free (already owned) 
Blue Tape: $5.93

First, I sanded down the bases, so that the paint might stick better. 
Then I taped up anything that I didn't want paint on, and gave them a few coats of spray paint.

After using some additional tape to remove cat hair, I made a small cup of water and the dyes, and painted it on the shades. 
I was super disappointed with the blotchy result, so I filled the sink with water and dye and dipped them in for a minute each.  I didn't rinse, because whatever the shades are made of didn't hold the dye very well.

Much happier, I set the shades out to dry...

Ta-da!  New lamps!

I love how they go with the quilt.

And how much softer their light is than the overhead one.  Also, the only other light in our room is turned on and off by climbing up onto the bed and pulling on the chain connected to the fan, so these are SO MUCH EASIER.
Mostly though, I love that they don't look like old lamps from the 80's anymore. Yea!

Total time and money invested:
A few hours 
and  $13.53

Wednesday, September 19, 2012

Antiqued Wood Guest Book Letters

 Another wedding craft!  Starting to feel like I should go into business...
For this weekend's wedding, the bride had a super fun idea of getting a jumbo T&J for the guests to sign rather than a guest book.  I knew I'd seen these huge letters everywhere, and went on a hunt.  A disappointing hunt.  The stores in our area were only carrying flat letters rather than 3-d, and the stores online had no "&" signs.  Tawnee found some on Etsy for like $50 a pop.  
Then she found out she had a family friend with some mad wood working skills who could make them, exact specifications and everything!   Awesome.

So here's what he sent.  He painted them gold.  Pretend like you can't see the blue.
Tawnee wanted them in her wedding colors, and she wanted them to have an antiqued finish.  This made me nervous, seeing as I've never antiqued anything, and I had a sinking feeling it was going to be more challenging than just taking a piece of sand paper to it.  

I tried to talk her into solid colors. She wasn't interested.  Then, as we were looking at paint colors, my eyes were magically drawn to a bottle of Crackle Medium, and all my problems were solved.  Carckle Medium would certainly do all the antiquing for me.  At least that's what the instructions seemed to be saying.  All of a sudden I was SO EXCITED TO START THIS PROJECT!
The instructions said to paint one layer (gold=done), let it dry, paint on the crackle medium, let it dry, and then paint on a top coat that would crackle when dry. 
 
I was seriously disappointed by the lack of crackle. 
 Maybe I didn't do it right.

So I re-painted it all, giving it a nice thick layer all the way around, and letting it dry for a long time. 

Only slightly more crackle. Time for some sand paper...

I sanded all over lightly, with a fine grit paper, exposing some of the gold below. 

And focusing extra time and effort on the edges. 

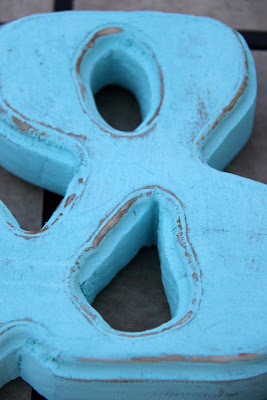
My favorite is this lovely ampersand. 

But they all turned out great.  Sand paper... not so difficult. 

At the wedding, guests signed in...

Their welcome table was somuch fun!

Super fun idea! I love how they turned out. 

Monday, August 20, 2012

Week 32: Subtle Transportation

Another friend joins the mommy club this September.  Yeah for April and Reiner!  When I asked about a color scheme for baby Jaxson, she said that they weren't doing a color scheme as much as they were doing a subtle transportation theme. 

To go with the theme, I made a set of subtle transportation onsies. 
Can you tell what they are yet?

 I scooped up a 5-pack of onsies at Joann for $10.99 (score!), and the rest of the supplies were already in my possession...
Spray adhesive
Embroidery hoop, floss, and needle
fabric scraps

I free hand draw some pretty adorable animals, but for some reason, I have no ability to draw vehicles.  So I spent some time on google images looking up line drawings of boats, planes, trains...

This one was easy enough to just look at and free cut some shapes.  A running stitch holds them all on, and makes the waves. 

 The hot air balloon was slightly more challenging. I sewed all the pieces together using a sewing machine, and I'll tell you, sewing on those curvy lines isn't something I'll do again. 

But I absolutely ADORE how quilt-y it turned out.  (This one is my fave.)

The words on each of these was done using rubber stamps, and a textile medium mixed with an acrylic paint. Don't dip the stamps, but use a brush to apply the paint, so it doesn't get too gloppy. 
Once the paint is completely dry set it with a hot iron.

I also spread the paint onto the tire tread of a toy car.  Vroom. Vroom. 

I added some tiny matching cars onto the tire tracks.

Lastly, to my mom and Alan's delight, I made a mo-ped.  

I did this using freezer paper (you could buy it at the grocery store, or you could just go to the butcher and see if he'd give you some for free. Mine did!).
 I traced the outline of the scooter onto the paper, and then cut it out.  Then I used a hot iron to adhere the outside frame of the mo-ped to the fabric, and then painted in the center.  The freezer paper creates a tight seal so that the paint doesn't spread. I let it dry completely, and then pulled the paper off. 

I outlined the scooter with a back stitch.  

Congratulations April!  Can't wait to hold your little guy!