Tuesday, October 30, 2012

Week 41: Chair and Ottoman Makeover

A few weeks ago we woke up early for some Saturday garage sale-ing, and scored these:
 stained but super comfortable.  We were intrigued by the price ($5 for both) and sold wen we tested them out.  

 The fabric was a bit grimy, with paint stains as well as the usual old dirty sweat-like stains. But we knew we could cover it.

And then! She gave us curtains that we could use to cover them!  Granted, the curtains had a few paint smears too (she's an artist).  I was hopeful we could cut around the paint marks, and the price (4 curtain panels for a buck) made it worth the gamble.

So.  To get started on the re-upholstering, I measured all the sides, adding an inch of seams, and a few inches to anything that would need to be pulled under and stapled. 
 The chair has sides that are shaped like somewhat curvy 'L's.  I tipped the chair over, and traced those onto the fabric because I knew I couldn't measure/draw with the same ease that a simple rectangle would allow. 

I started by sewing some of the seams, and then fit it to the furniture with the seams on the outside, and pinned as if I was pinning a garment on a mannequin.
For the ottoman, I sewed each of the sides to the top (making a cross) and then pinned all the edges together, making it fairly tight. 
 The chair was slightly more difficult.  I started by sewing the back rest, the seat, and the front to one of the L-shaped sides. Then I laid it on the chair, and pinned the back rest to the seat, and the seat to the front.  After sewing those, I fit it back on the chair, and pinned the other 'L,' starting with the corners and turning points, and then pinned between. Lastly, I added the back. 

Then we flipped them over, removed the legs,  pulled the fabric nice and tight, staple gunned it, and reattached the legs.

The chair fabric was lacking a bit.  This was my put-down-the-camera-and-help-me face. 

Ta-da!  So much cleaner and fresher looking!  Happy girl. 

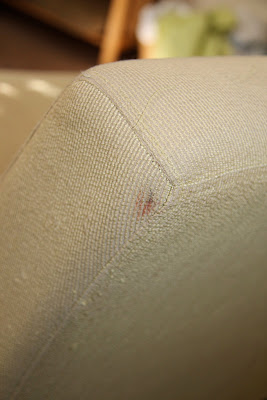
They aren't perfect... there's this corner...
 ...and the fact that the chair fabric is stretched so tight that every time I sit down I half expect all the seams to explode. 

But I'm feeling pretty happy with the outcome.

And I'm feeling like I might be able to tackle some clothing design after all of this pinning-to-a-figure business. 

Total cost and time:
2 hours
Chair and Ottoman: $5
Fabric: $0.50
 Total: $5.50
 

Monday, October 29, 2012

Week 40: T-shirt Love

 Ok guys... I just looked at a calendar, and counted the weeks... I'm WAY behind some how.  So this week, we cover weeks 40-43. Aaannnddd... GO!

Back in August, one of our dearest friends had a birthday.  I was really struggling over what to do for him, as I often struggle for gifts for guys, but also because we were at our poorest. 

Luckily, the night before his birthday, a craft idea came to me.  And it was something I could do in a super small amount of time.  Yes!

I stole my fave photo of him and his darling dog off of Facebook, cropped it to just him and Brakley, blew it up, and printed it out on regular paper in black and white. 

 How cool is this photo?!?

I cut Mateo and Brakley out, hugging the edge of their shapes, to make a silhouette. Then I traced it onto freezer paper and cut them out again.  I did my best to keep the frame intact, and then ironed that part onto a new t-shirt, so that the negative space was my friend and his dog.  Freezer paper makes a super tight seal when ironed, allowing me to paint cover it without any paint leaking past the edge. It's like painters tape for fabric paint. 

I mixed orange acrylics with a fabric medium and painted it onto the t-shirt.  I let it dry for a few hours, then peeled the freezer paper off, and ironed to set the paint.  

Ta-da!

He's contemplating how much he loves it.  Turns out it's a lot. 
Me too.

Sunday, October 28, 2012

Wall Week: Wedding Wall

To wind up "Wall Week" I have one more gallery wall. As it turns out, this one is my favorite, so it's lucky that it was also the last finished. 

Our Wedding Wall, from right to left, starts with the 1 year anniversary present Alan made me: our vows hung from one of the signs we made to direct people to the wedding. I love that the sign has our initials and an arrow pointing to the picture of us next to it.  Planned that.

The picture it's pointing to an enormous black and white that we blew up for a few bucks at Costco, and framed with one of the free frames Molika gave me.  There is no backing, and no glass, which doesn't matter to me. Though, I really should get some more tape to stick it to the wall so it stops having that big curve in it.

Next up is the GORGEOUS guest book my super wonderful friend drew for me. She used a picture of the house we got married at, and added us to the front porch.  But she free-handed all of that!  So talented.  She left all of the leaves off of the trees, the flowers off of the bushes, and the bricks off of the driveway, and our guests added those with their finger tips and some stamp pads. She worked the table to make sure everyone signed in, (and did it right) and she even took pictures of all of them doing it! Because she's amazing. 

Above that is a picture of every guest at the wedding. Love it. 

To the left is a gift from our officiant/day of coordinator/lovely friends.  The picture is one from the ceremony, and the words are all of the blessings our friends said during our "ring bearing" ceremony.  After deciding not to have a wedding party, we asked all of the friends and family who would have been included to say something about love or marriage while passing the ring from he back of the crowd to the front and eventually to us.  It was my favorite part of the ceremony, and actually the whole day.  And this is such a lovely reminder.

Above that is another gift from another couple of amazing friends.  She swears she bought this Etsy art before we even ever decided to get married.  Lucky for her it worked out for us. Even luckier, the color she picked out was one of our wedding colors.  Fate. And love. 

On the far opposite side of the wall is a first dance picture, and my gift to Alan for our 1st anniversary (a list of all of the things we did in our first year of marriage behind a silhouette of us). 

I just love this wall. I love all the white frames (so many of them were white to start, that I painted the rest to match).  I love the balance.  I love the straight line on the bottom. Mostly I love the story it tells about the best day of my life so far.
Love Love Love. 

Eventually there will be a few more additions: a couple more photos, my "something old" hankie, and Alan's airplane pin. 

As for the walls in our apartment... there are a few more that need some love:
Bathroom walls, and bathroom in general: SO BLAND.
Gigantor: the biggest wall in our apartment, spanning from living room to dining room is EMPTY.
Jacked: the wall in our dining room that inexplicably has a phone jack in the direct center. Ugh.

We'll get there.  Or maybe not. Got any ideas?

Tuesday, October 23, 2012

Wall Week: Worldly Wall

 For a super small space, our living room sure has a lot of empty wall space.  Well not so much anymore.  In a fit of frustration and exasperation, I slapped a bunch of nails into the wall and threw up everything travel related I could find.  I was SUPER over the blank walls, but also I was over the collection of crap on our floor.  

 My lovely friends D&B are my "Gallery Wall" idols.  I will in no way ever get close to their wall beautifying talents, but I have MUCH less patience for organization that she has, and MUCH less level-hammering skills than he has.  That being said, I love that they have a wall dedicated to travel pictures, and items they had picked up in foreign countries.  So I copied.  Sloppily.

 The silver Evil Eye decor came as a gift from our wonderful former coworkers. It is supposed to watch over us and protect our lives, home, and marriage from evil.  It definitely adds Turkish flare.

I KNOW I asked Alan to save the key from our first home together. He KNOWS he did.  NEITHER OF US know where that key is at the moment, but there's a place for it when we find it...

We ended up with lots of coinage from our trips over the past few years.  I straight up hot glued them to some fabric, and hot clued the fabric to the back of the frame.  It'll peel off if we ever want to spend it. 

I wish I had collected old maps wherever we went.  Or even just tourist maps.  That being said, I probably would have tossed them all when we were packing to come home.  So I Google mapped all the places we've been and lived in the past few years, cut them out in heart shapes, and glued them to burlap.  

Pictures are of us, and the things we say in Italy, Spain, The Netherlands, and Turkey.  
The paintings are a Map of Turkey, and Alanya Scenery
I have more things to add some day, (a HUGE map of the world to chart our adventures, Turkish tea and coffee saucers and spoons, the missing key...) but for now, this is it.  It's not perfect, but it's not on the floor, and the wall no longer looms like a gigantic space of boring.

Monday, October 22, 2012

Wall Week: Frame Fabulous

So, I've been looking all over for some HUGE and inexpensive frames to decorate the wall behind our bed. I was having so much trouble finding any for good prices... garage sales, swap meets, and the Goodwill were all over charging.

Just as I was about to give up, my darling friend invited me over to "swap meet" through her left over wedding decor, AND LOOK WHAT SHE HAD!  All. For. Free.  Gotta love her.


Most were in need of a good cleaning, and some desperately needed updating.  Nothing some paint can't fix.


Luckily, I happen to have all the colors in my gorgeous quilt as paints.  Apparently I love these colors.


So I freshened them up with some coats of paint that would go with the quilt,

and the lamps. 
And then I hung them on the wall in a somewhat random pattern.

LOVING how they turned out.  Also, bonus: we had an earthquake the other night and none of the frames shook off the wall and crushed our heads!  In fact, without glass and backings the frames are light enough to probably only bruise, rather than smash, our heads if they fell.  Though, that would probably be super scary.
Wall 2: Decorated for free, Yo!

Sunday, October 21, 2012

Week 39: Wall Week: Mini Wall

Welcome to "Wall Week," where I catch you up on what I've done to transform our walls from boring things that hold up our ceiling to something fun to look at.  Keep in mind that we're renting, and don't want to do anything more drastic than hanging a few things with nails.  Definitely no painting. 

Today you get to meet "Mini Wall." Mini hangs out in our kitchen between two cupboards.  We've grown close during my hours of dish washing, but to be honest, she's kind of a dud.  No real personality, or character.  But she's got potential.  And when I asked if she'd be interested in a makeover, she was open to it. 

So I took some left-over twine, a stack of paint chips we're thinking about for our dresser, and two nails...

I wrote s few words in permanent marker...

And I gave Mini a new fresh look.  

Now whenever I get grumpy about all the dishes, Mini reminds me of what the dishes represent, and all I have to be thankful for. Thanks Mini, you're such an optimist!


Saturday, October 13, 2012

Dining Room Table. Now With Hella Character

In our quest to thrift an affordable apartment, we've picked up a bunch of free items. Free pallet+free fencing=free table, right?  Actually no.  This project was kind of a comedy of errors. When it came to all the money we spent on supplies for this baby, we could have bought something new. And not spent multiple weekends building it. 

But when it came time to calculate all of the things we were buying, and I turned to my husband with a defeated sigh, and offered to give up, he rallied.  He sweetly reminded me that this table (and life) wasn't ALL about saving money.  I had goals and ambitions that building a table would meet.  I had dreams of learning how to woodwork.  I had fantasies of a beautiful recycled fence table. If we had to spend a little more money for me to have this experience, he felt it was worth it.  Even if he kind of hated the idea of eating dinner on the gross old wood in the trunk.  Love that guy.
So I bought a blade for the blade-less saw our friend had.  Also we bought a face mask, and I donned some goggles.  Because "safety first" my friends. 

Also, when using a saw, safety suggests that one should focus on one's work, rather than the camera.  So this is my safe action shot.
I started by cutting the fence boards into manageable pieces.  The I started doing the math.  I wanted the finished table top to measure 30"x42" which would give a small overlap on all sides of the pallet. With 6" wide boards I needed 5 rows.  I cut the best parts of the boards down to 21", and then I cut those pieces somewhat randomly so my mosaic would look more lovely. I also cut one AMAZING slat 42" and then left it as is.  Alan pointed out that the holes that I felt gave it its beauty were also the places that would drive everyone setting a glass down crazy, but with it placed in the middle, I think we'll only be setting serving dishes there.
Then I laid it next to the pallet we had spray painted for this project, and all of a sudden I HATED the turquoise. I even hated it when I sanded it down a bit.  So we stopped our project there and went to pick up some navy.

Much better. 

I laid out all the fence pieces in a way that I loved, and then I flipped the whole thing over, and laid the pallet on top.  Notice that the way I cut my fencing, the pallet slats lay perpendicular to the fence slats, rather than parallel. I have a feeling attaching would have been much more challenging the other way around.

I checked all four sides to make sure that they all had an even amount of overlap...

Then I screwed it in with a million screws. I may have gone a tad overboard, but the table top is secure, which was the goal. 

I got hot and cranky right before the last slat, and Helpful Husband jumped in.  Thank goodness. 

Because this may or may not be lead-based paint (don't judge me) it was super important for me to cover it with a sealant.  First though, I would have to remove all dirt, grime, and spiderwebs...

I used an entire can of sealant, which allowed 5 solid coats.  While those were drying I sanded and painted the 2x2s we picked up for temporary legs. (I really want some super industrial looking legs like metal hair-pin legs, but those guys are EXPENSIVE, and we aren't sure how much we're going to love this table yet).

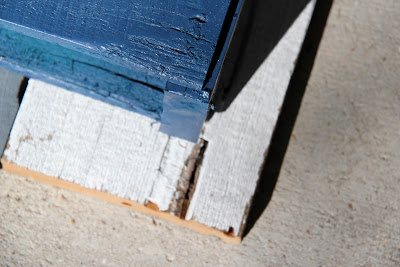
We drilled the legs in using some L-shaped brackets. And our project was complete!

I am so happy with how it turned out.  We've only had one thing tip over because of less-than-careful placement, Woo-Hoo!  If we end up LOVING this table too much to get rid of it, we'll probably get some glass cut to cover it,  but for now I have a fun place-mat craft planned. 

Total Cost and Time Spent:
  
Lots of time... 10 hours over 2 days?
Pallet: free
Ceder fencing: Free
Safety mask: $4.97
Saw blade:$19.00
Screws: $6.47
Sand paper: $9.97
Teal Spray paint: $3.87
Navy Spray paint (2): $8.98
Sealant:$3.87
Table legs: $5.48
White paint: Free (left over from chairs)
Brackets: $7.98

Total: $80.50

In the end, it's unlikely we'll ever make our money back on this table, but it was fun to build and it has "Hella character."  Thanks for saying so Bryan!